
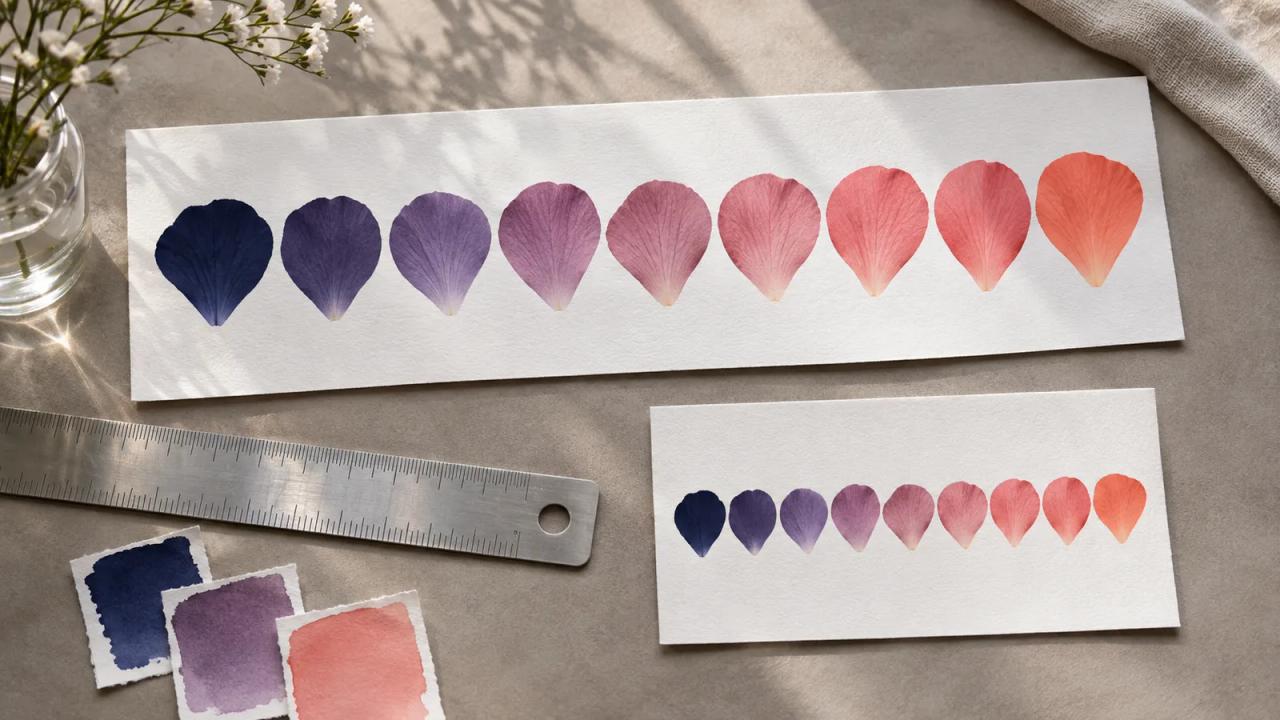
Build your banner motif from two editable end shapes, then use Illustrator's Blend panel to control the forms between them. Keep an evenly spaced version as a reference. Adjust the position of the shapes and the pace of the color transition in separate passes so you can tell which change improves the design.
Ravi, a fictional illustrator, has to fit the same workshop motif into a wide email header and a narrow counter card. He draws a large navy petal and a smaller coral petal. The open question is how many forms can fit before the row starts to look like a continuous stripe.
| Design decision | Filled fictional banner brief | Proof to check |
|---|---|---|
| Motif | Two rounded petal silhouettes, navy and coral | End shapes retain their profiles at the intended size |
| Wide reference | Four intermediate steps, even spacing | Six visible forms including the end shapes |
| Narrow candidate | Two intermediate steps | The smaller card still shows distinct forms |
| Spacing comparison | One copy with steps gathered toward the coral end | Gaps stay clear beside the event title |
| Color comparison | Change the color transition on a separate copy | Shape positions match the chosen spacing proof |
| Handoff | Editable Illustrator source plus the two approved exports | Reviewer can adjust the blend and identify each export |
Adobe's November 10 MAX announcement highlights the persistent Blend panel and on-canvas preview controls. The exercise below uses those controls to build one repeatable graphic across two layouts.
Draw endpoints with readable silhouettes
Start on the wide artboard and place the two shapes where the motif should begin and end. Leave room for the event title before you create intermediate forms. Use two related silhouettes if the job calls for a gradual change in shape. Inspect the first preview for odd pinches or overlaps around the curve.
Name the editable object for its role in the layout, such as Workshop petals. Keep headline text separate. The next designer should be able to shorten the event title while leaving the motif's path and source shapes intact.
Set the number of forms before shaping the rhythm
Select the endpoint objects, open Window > Blend, and create the blend from the panel. In Adobe's Blend panel instructions, Steps controls the number of intermediate forms. Ravi uses four steps in the wide reference and counts six visible shapes including the ends.
Review at the export size. If the shapes collide, move the endpoints farther apart or reduce the number of steps. Choose the spacing mode for the job. A known count is useful for this banner. A fixed distance can be a useful starting point when consistent intervals matter more than a specific count.
Move the shapes and colors in separate passes
Duplicate the even reference before trying easing. With a spine available, the Easing controls change where the intermediate forms gather along that path. Ravi starts at zero Ramp for an evenly spaced reference. He then tries Ease Out with a 25 percent Ramp to draw the steps toward the end of the path. He checks that the coral petal is at that end and compares the tightened gaps with the reference. He keeps the first version whose gaps remain legible around the headline.
Make a new comparison for color. Use the Shift slider under Appearance to move the color transition along the path while keeping the object spacing fixed. With the spacing held constant, examine whether more of the row should read as navy or coral. Preserve the preferred version and record the decision in one sentence for the reviewer.
Rebuild the narrow proof around the title
Place the actual short event title in the card layout before moving the motif over. Ravi begins with two intermediate steps because the narrow card has less horizontal room. The first version is a candidate that he can judge at actual size.
If the card needs a curved run, check orientation and the bend near the tightest gap. Adobe's Illustrator 31.0 release guide, updated November 12, documents added spine options and easing handles on the canvas. Adobe's Blend panel documentation notes that easing requires a spine. If the easing controls are dimmed, check whether the selected blend has a spine. Keep a version with the original spine before reshaping the narrow proof.
Keep the blend editable through review
Give the reviewer the live blend with the wide and narrow artboards clearly named. Ask for one change they can perform, such as reducing the step count on the card and undoing it. That quick edit checks whether the source they received is useful for revisions.
If a supplier asks for individual editable objects, use Expand on a delivery copy and keep the live blend in the master file. Compare both exported files with the approved proofs. Open the wide image at its delivery dimensions and inspect the narrow print proof at its intended physical size.
Deliver the proof that matches the placement
Record the approved count, color direction, and filename for each placement. Let the email header and counter card have their own spacing when their sizes demand it. Their relationship comes from the shared endpoint shapes and colors.
Use the o1 guides or o1 AI workspace to adapt the written brief. The o1 specifications describe the device in development. Build and inspect the vector artwork in Illustrator.
Choose a banner you need in two widths. Draw its two end shapes, set one live blend, and send a wide and narrow proof with the editable master.