
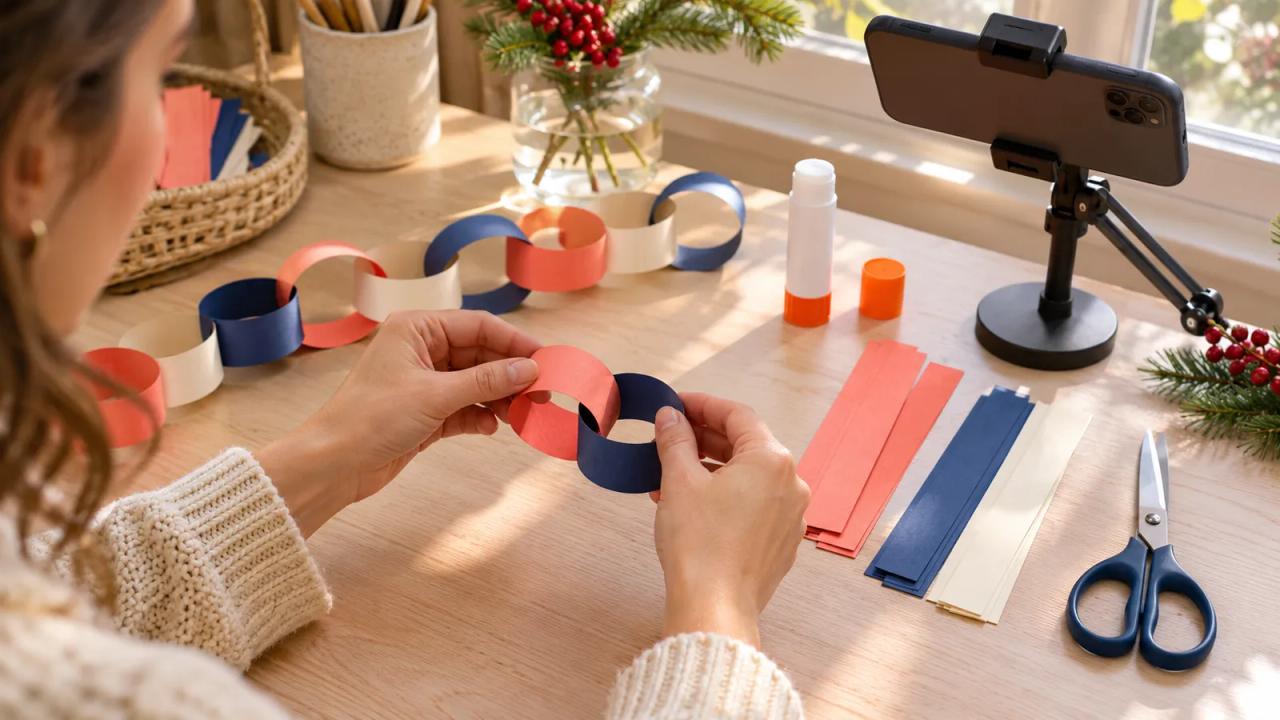
Build the tutorial around one paper link a viewer can reproduce. Show the finished garland, give the strip size and joining method, then demonstrate how a second strip passes through the first loop. A viewer should be able to pause the video and make the same small chain.
Imagine Lena, a fictional craft creator, making a colorful garland for a shelf. She has paper offcuts and a phone on a stand. Her useful lesson is how to join the links cleanly while keeping the colors in a repeatable order. The following shot card is an illustrative plan, ready to adapt after a real craft test.
| Lesson beat | Lena’s example choice | What the frame must show |
|---|---|---|
| Finished result | A short coral, navy, and cream chain | Every link hangs freely above the shelf |
| Materials | Paper, ruler, pencil, scissors, glue stick | All supplies sit inside the frame |
| Strip size | A starting size of 2 × 15 cm | Ruler markings sit beside one strip |
| First join | Overlap the ends to close a loop | Fingers move away so the overlap is visible |
| Next link | Thread a navy strip through the coral loop | The unjoined strip passes through the opening |
| Repeat and finish | Follow the coral, navy, cream sequence | The final chain matches the opening example |
Choose a question the trend can answer
TikTok’s November 17 holiday report describes Whimsy Christmas as playful, colorful, and rooted in DIY, including paper-chain garlands and homemade gifts. That gives a craft creator a timely subject. The useful editorial decision is the precise question this tutorial answers. Lena chooses “How do I make a paper chain with even links?” Read TikTok’s holiday report.
Check that wording against questions people actually ask. TikTok’s earlier Creator Search Insights announcement describes search topics and a content-gap filter, with availability in select regions. If your account has access, use it to investigate the question. An existing viewer comment can also supply a concrete starting point. Record the question and where you found it. See TikTok’s Creator Search Insights introduction.
Make one link before recording
Cut one test strip, form a loop, and check how it looks in your intended display spot. The dimensions in the table are a starting choice for this fictional example. Paper stiffness, overlap, and the size of the finished decoration affect the result. Measure the strip you actually use and carry that measurement into the shot card.
Join the ends using your chosen adhesive’s package instructions. Check the link after the join has set as directed. Add another strip through it and see whether both loops move freely. If the paper buckles or the join opens, adjust the material or overlap before filming.
Keep this tested pair beside the camera. It becomes the reference for the finished example and every close shot.
Film the connection from a readable angle
Arrange the supplies on a plain surface with enough contrast to see each paper edge. Frame the strip, hands, and join in the same plane. Make a short camera test and review whether your fingers cover the exact moment the ends meet. Move the phone or change your grip until that action stays visible.
Record the six beats from the table. Hold the ruler still for the measurement shot. Show the unjoined navy strip passing through the coral loop before closing it. Leave a pause after the join so viewers can understand the shape.
Film the repeat from the same angle. Finish with the actual chain made during the demonstration, keeping the opening color sequence visible. Save a clear still for the cover image.
Put the measurements in the caption draft
Write the spoken explanation while the tested link is on the table. “My strips are two centimeters wide and fifteen centimeters long” is useful only when it matches the ruler shot. Identify the paper and adhesive you used without implying that every substitute will behave the same way.
Keep the caption draft beside the shot card. Include the strip dimensions, the color sequence, and a reminder to thread each new strip through the previous loop. Use short caption units around each action so the words can be read while the hands move.
Read the draft aloud against the footage. Where the explanation runs ahead of the demonstration, add a pause or shorten the line. Check punctuation and units before exporting.
Give the exported video a cold test
Open the exported file on a phone and watch it with sound off. Can you read the measurements? Do captions hide the join? Is the threading step visible without replaying several different angles? Make revisions in the editor, export again, and inspect that new file.
Ask someone unfamiliar with your process to try one pair of links using the video. Have them describe where they paused or needed another detail. This is a small usability check for your instructions. Record any ambiguity, such as which ends overlap, and address it in a close shot or a clearer caption.
Then watch with sound on. Confirm the narration, captions, and visible strip size agree. Keep the approved export separate from earlier versions.
Publish a lesson with a useful next step
Use a specific title such as “Paper-chain garland tutorial with measured strips.” Put the actual materials and measurements in the description. Choose a cover where the finished links are easy to recognize. A viewer who wants the craft should understand the result before pressing play.
After publication, collect practical questions about the process. A recurring question about thicker paper could become a separately tested follow-up lesson. Keep the original instructions available so later changes remain understandable.
Use the o1 guides and o1 AI workspace to organize a tutorial brief and review checklist, then verify every measurement against your physical sample. The o1 specifications describe hardware in development. This workflow uses your own camera and editor, with manual craft testing and export review.
Before filming, make the two connected links and write the exact instruction that helped you join them.